So you are on the quest to learn to do a handstand. Welcome buddy, same here. Let me tell you that can take some time – we’ll talk months to years here depending on your starting point. Don’t be scared though – many calisthenics skills cost time, effort, and patience.
Besides putting in the work anyways, knowing the most important choices and choosing the right exercises is crucial when it comes to the learning process.
Some exercises are better than others, but all try to enforce the same goal. First getting your upside down fearless, learning the push and most importantly spending as much time on hands as possible.
And that’s what we’re gonna talking about today, folks – the most helpful exercises most useful to learn a handstand!
The common Mistake when learning the Handstand
Many people – I definitely included – start by kicking up relentlessly praying to stick on lucky rep. The thing is:
Kicking up and hoping to stick a rep is insanely inefficient!
What will help you learn a handstand is time on your hands. As much time as possible. And the former method won’t let you spent that much time on hands. Maybe a lucky 30-60s per workout. Compared to other methods, where one uses the wall as support, this number is tiny and could be accomplished in one single set.
But before we talk about wall supported exercises, we first have to conquer fear – because being inverted is definitely scary at first.
Learn to do a Handstand with these 3 Drills
Learn to Bail: Cartwheel
To conquer the fear of falling on ones but, knowing how to bail tremendously helps. One day this program aka bailing.exe will run on autopilot. But until then you will fall onto your butt a few times. It hurts less than you’d think right now!
Bailing.exe is literally a cartwheel or a step out to one side. We’ll talk here about the cartwheel. Learning the basic cartwheel will let you acustomize to being upside down, condition your wrists, and help you master your fear. Check out GMB’s great tutorial on cartwheels.
After you’ve mastered your basic cartwheel, it is time to practice it a few times starting in a belly to wall handstand. Bailout a few times to each side per session. You’ll quickly feel which side comes naturally to you.
My tiny piece of advice would be to practice it a few sessions until you feel safe and then get rid of it. Don’t make bailing a practice itself and run into the dangers of bailing each rep too early on.
Work 3-4 times a week for 10min on your cartwheel until it feels solid.
Feel the Push: Wall Handstand

One of the best exercises for MANY purposes is the belly to wall handstand. It will accompany you for a long time. Check out Tom Merrick and Ulrik Ask Fossum’s tutorial on this exercise.
It is great for these reasons:
- It will teach you how to push
- It will condition your pushing muscles and wrists
- It is an entry-point to many other wall-supported exercises
- It can be used as an endurance exercise
To get into it, walk up the wall. If you don’t feel secure bailing out from the wall at first, be sure to leave enough energy in the tank to walk down again. If you feel save up there try to bail out to both sides for a few times.
When you can walk up the wall and know how to bail, the real fun begins! Now you can condition yourself using this exercise and kick ass. Or explore the position more freely.
Work 3-4x a week the belly to wall handstand. Go for 5-10 sets of 20-60s if this is your main focus or 3xMax at the end if used to condition yourself.
Learn Balancing: Crow Pose
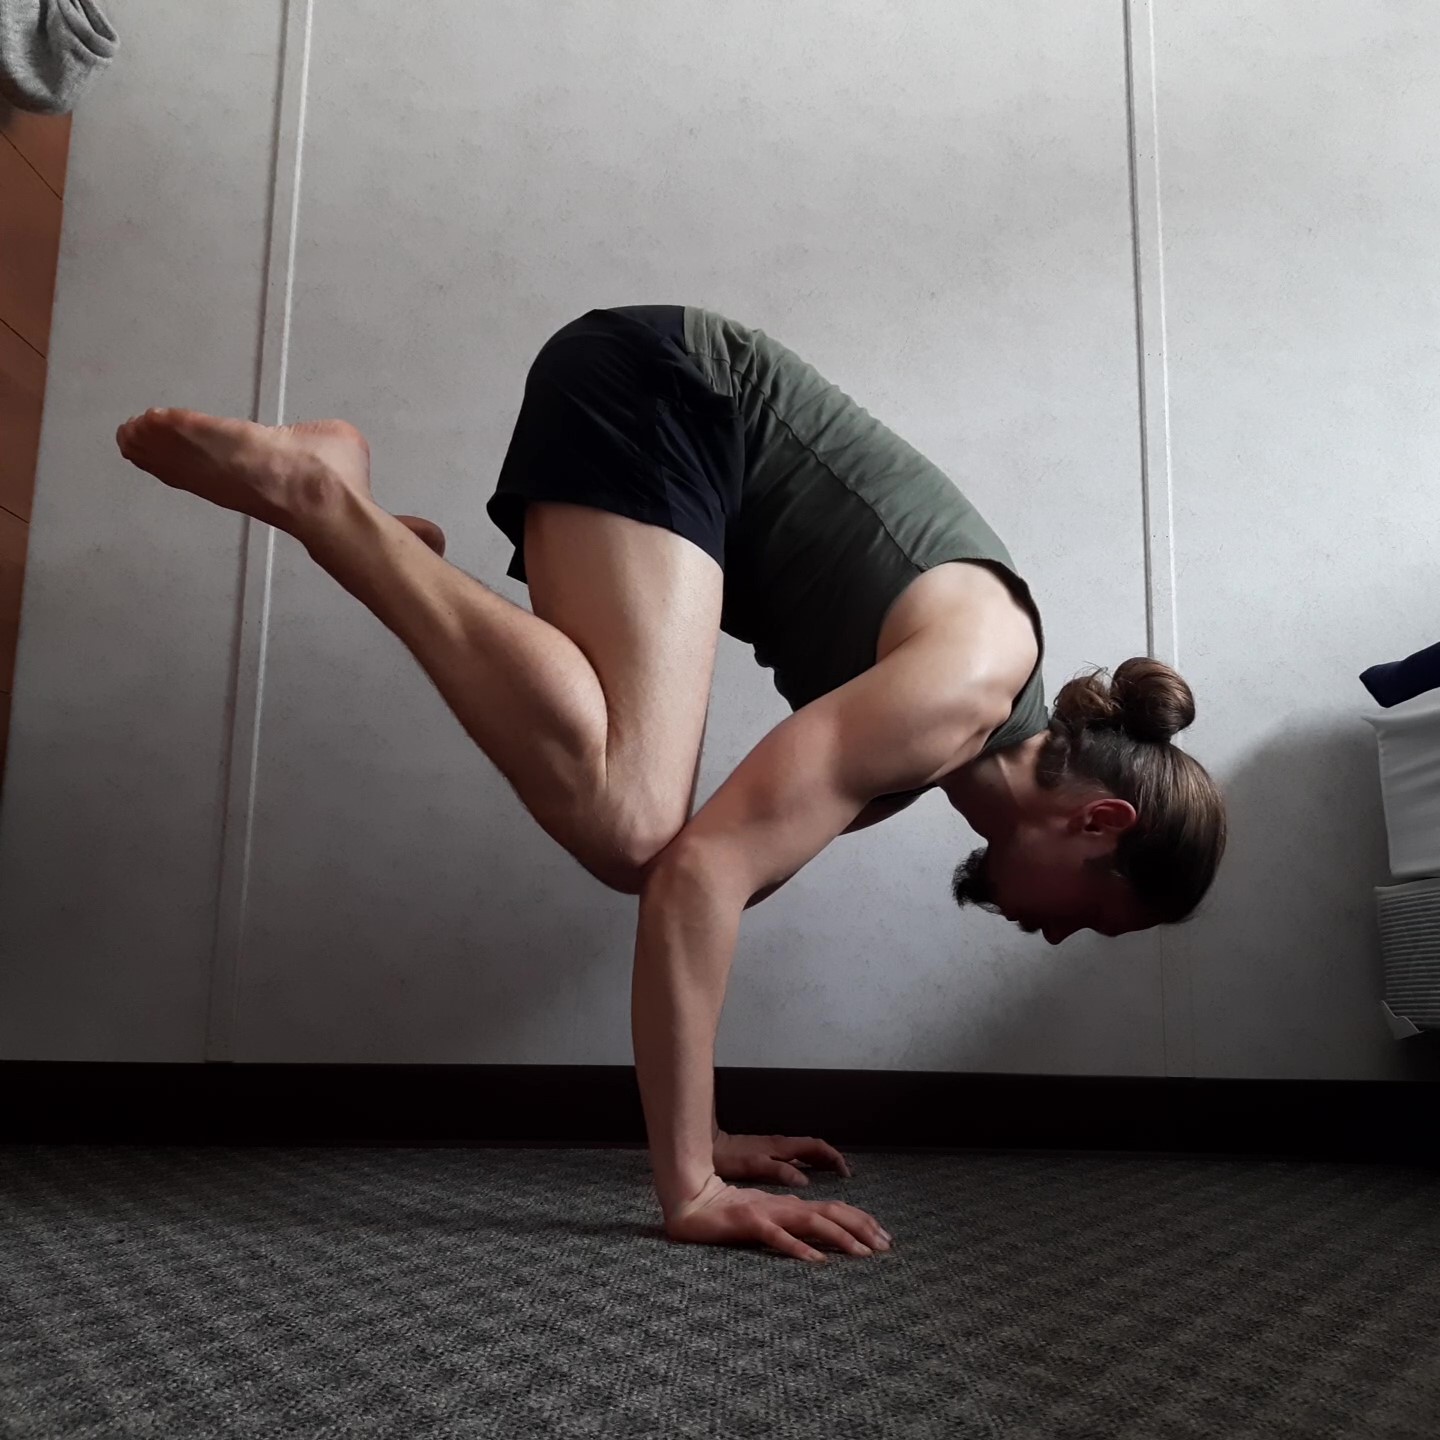
The Crow Pose is a yoga position, which uses a low, bent-arm elbow balance. That’s why balancing it is easy in comparison and can be a great tool to built up wrist strength and learn how the balancing process should feel like.
When starting out put a pillow before your head and practice on a mat. Enter the Pose by putting your hands onto the floor, your knees onto your elbows and then leaning forwards.
Push with your arms actively into the ground and avoid falling over by jamming your fingers into the floor. This finger motion is the main mechanism to fight overbalance – aka falling onto your face in this particular position – and is a matter of brute force.
Start with one leg floating and if you feel secure you can try to float up with both legs. What helped me are tiny jumps into balance. After sticking the first balances, it is just a matter of practice of being able to stay into this shape.
Perform 3-5sets of 20-60s Holds.

What to do after I mastered these 3 handstand exercises?
Learn how to balance with Wall Scissors
After learning to bail, the wall handstand, and the crow you should start to expand your arsenal and go for more taxing wall exercises. Your new goal should be to spend as much time in balance as possible.
Wall Scissors are a great way to spend time in quality balance. These further condition your body and teach you lots about balance, as well as body position.
Did you notice something?
We haven’t talked about kickups once yet. Free balances are seductive. That’s because you should know how to balance before endlessly kicking up. Don’t fall into this pit. Been there, failed horribly.
Other good handstand exercises are:
- Heel Pulls
- Toe Pulls
- Slide Aways
- Pike Aways
- Wall L-Handstands
But these exercises make up the material for another post when I learned more about them on my own journey. I hope I could bring you these 3 important exercises closer, and they will help you out big time on your question to learn to do a handstand.
Keep me updated where you are stand within your journey! Did you start yet, or never been inverted? I remember starting to play around with crows like 4 years ago just to faceplant horribly, for non-educated and stupid reasons.
So what is your story?


